ေမတၱာရပ္ခံခ်က္

ကၽြန္ေတာ္ သိ႐ွိနားလည္ထားေသာ အေၾကာင္းအရာမ်ားအား မသိေသးေသာ လူမ်ားအတြက္ သိ႐ွိနားလည္၍ အေထာက္အကူ ျဖစ္ေစရန္၊ သိ႐ွိနားလည္ၿပီးေသာ လူမ်ားအတြက္ Revision ျဖစ္ေစရန္ ရည္႐ြယ္၍ ေရးသား ေဖာ္ျပေပးျခင္း ျဖစ္ပါသည္။ ကၽြန္ေတာ္၏ အေရးအသားထဲတြင္ အမွားမ်ားပါပါက ျပင္ဆင္ဖတ္႐ႈ႕ ေပးပါရန္ႏွင္႔ အမွားအား ေထာက္ျပျခင္းမ်ားကို လုပ္ေဆာင္ေပးပါရန္ ေလးစားစြာ ေမတၱာ ရပ္ခံအပ္ပါသည္။

Sunday, April 27, 2008

Start တြင္ မိမိ ႀကိဳက္ႏွစ္သက္ေသာ နံမည္ေပးျခင္း

ကၽြန္ေတာ္တို႔ ငယ္ငယ္က Computer သင္ေပးေသာ ဆရာ ၊ ဆရာမ Computer တစ္လုံးအား စတင္ အသုံးျပဳေတာ႔မည္ဆုိလွ်င္ Start ကေန သြားပါဟု သင္ၾကား ျပသေပးခဲ႔ၾကသည္။ ကၽြန္ေတာ္တို႔ ေခတ္မွာေတာ႔ Start ကေန သြားပါ အစား မိမိ ေပးထားေသာ နံမည္မွ သြားပါဟု ေျပာဆုိႏူိင္ေစရန္ ကၽြန္ေတာ္ႏွင္႔အတူ လုိက္လုပ္ၾကည္႔ရေအာင္ ….

၁။ Windows တင္ထားေသာ Drive C:\WINDOWS ထဲတြင္႐ွိေသာ explorer file အား Copy လုပ္ၿပီး C:\WINDOWS ထဲတြင္ Paste လုပ္၍ explorer1 ဟု နံမည္ေပးပါ။


၂။ Windows တင္ထားေသာ Drive အား Double click လုပ္ပါ။ C:\ ထဲတြင္ explorer backup file တစ္ခု တည္ေဆာက္ၿပီး Copy လုပ္ထားေသာ explorer file အား Paste လုပ္ပါ။


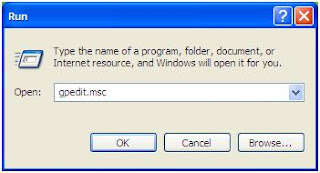
၃။ Start - Run ကိုသြားပါ။ Run တြင္ regedit ဟု႐ိုက္ထည္႔ပါ။


၄။ Registry ထဲ ၀င္သည္႔အခါ အမွား တစ္ခုခု လုပ္မိလွ်င္ ျပႆနာ ျဖစ္ေပၚႏူိင္ေသာေၾကာင္႔ မိမိ ေနာက္ဆံုး လုပ္ေဆာင္မည္႔အပိုင္း မတိုင္ခင္တြင္ backup file လုပ္ေဆာင္ရန္မွာ အေရးႀကီးေသာ အခ်က္ တစ္ခ်က္ ျဖစ္ပါသည္။ HKEY_LOCAL_MACHINE\SOFTWARE\Microsoft\Windows NT\CurrentVersion\Winlogon အား Right Click – export မိမိ ႏွစ္သက္ေသာ နံမည္ေပးၿပီး Window မတင္ထားေသာ Drive တြင္ Save လုပ္ပါ။ ျပႆနာ ျဖစ္လာလွ်င္ မိမိ Save ထားေသာ backup file ကို Open လိုက္လွ်င္ အားလုံး အဆင္ေျပသြားမည္ ျဖစ္ပါသည္။

၅။ HKEY_LOCAL_MACHINE\SOFTWARE\Microsoft\Windows NT\CurrentVersion\Winlogon အား Click လုပ္ပါ။ ညာဘက္႐ွိ Box ထဲတြင္ Shell file အား Double Click ပါ။ Value Data: ေအာက္႐ွိ Box တြင္ explorer1.exe ဟု႐ိုက္ၿပီး OK ေပးပါ။


၆။ Resource Hacker Software အား Run ပါ။


၇။ ResHacker - File – Open – explorer1 – Open ေပးပါ။


၈။ String table – 37 – 1033 Click ပါ။ ညာဘက္႐ိွ Box ထဲတြင္ “start” ေနရာတြင္ မိမိ ႀကိဳက္ႏွစ္သက္ေသာ နံမည္ ( e.g:“candle528” ) ေပးပါ။ Compile Script ကို Click လုပ္ပါ။ File – Save လုပ္ၿပီးလွ်င္ Restart ေပးပါ။


၉။ Windows ျပန္တက္လာေသာအခါ Start ေနရာတြင္ ကၽြန္ေတာ္တို႔ Change ထားေသာ နံမည္ candle528 ဟု ေျပာင္းသြားမည္ ျဖစ္ပါသည္။


မွတ္ခ်က္။ ။Windows XP တြင္သာ အသံုးျပဳႏူိင္ပါသည္။ Operating System တြင္႐ွိေသာ မည္သည္႔ Language မဆို Change ႏူိင္သည္။ ျမန္မာလုိေလး Change လုိ႔ရရင္ ကၽြန္ေတာ္ကို လက္တို႔ လုိက္ပါဦးေနာ္ ... :)

Double Click လုပ္ၿပီး USB & Drives ေတြထဲ ၀င္၍ မရေသာ ျပႆနာအား ေျဖ႐ွင္းျခင္း

ယခုတေလာ ကၽြန္ေတာ္႔ သူငယ္ခ်င္းေတြမွာ အဲဒီ ျပႆနာ ေတာ္ေတာ္ေလး ျဖစ္ေနတာကုိ ေတြ႕ရတယ္။ သူငယ္ခ်င္းတစ္ေယာက္ဆိုလွ်င္ Windows အႀကိမ္ႀကိမ္ ျပန္တင္တာေတာင္ မရတာကုိ ေတြ႕ခဲ႔ရဘူးတယ္။ သူငယ္ခ်င္းတုိ႔ ပတ္၀န္းက်င္မွာ ဒီျပႆနာနဲ႔ ႀကံဳေတြ႕ရတဲ႔သူ ႐ွိလာခဲ႔လွ်င္ အလြယ္တကူ ေျဖ႐ွင္းေပးႏူိင္ေစရန္ ရည္႐ြယ္၍ ေရးသားျခင္း ျဖစ္ပါသည္။

၁။ Start – Search – All files and folders – All or part of the file name: ေအာက္႐ွိ Box တြင္ wscript.exe ဟု႐ိုက္ပါ။ Look in: ေအာက္႐ွိ Box တြင္ Local Hard Drives [(C:;D:)] ႐ွိသေလာက္ ေပးပါ။ Search ကို Click ပါ။ ညာဘက္႐ွိ Box တြင္ wscript ႏွင္႔ ပတ္သက္ေသာ files မ်ား ေပၚလာပါက Delete လုပ္ပါ။

၂။ Start – Run – cmd ဟု ႐ိုက္ထည္႔ပါ။


၃။ Command Promt ထဲတြင္ del c:\autorun.*/f/s/q/a ဟုေရးၿပီး enter ႏွိပ္ပါ။ del d:\autorun.*/f/s/q/a ဟုေရးၿပီး enter ႏွိပ္ပါ။ del e:\autorun.*/f/s/q/a ဟုေရးၿပီး enter ႏွိပ္ပါ။ Local Hard Drives [(C:;D:E)] ႐ွိသေလာက္ ေရးရမည္။ USB Drive သည္ G ျဖစ္ပါက del g:\autorun.*/f/s/q/a ဟုေရးၿပီး enter ႏွိပ္ပါ။


၄။ Start - Run ကိုသြားပါ။ Run တြင္ regedit ဟု႐ိုက္ထည္႔ပါ။


၅။ HKEY_LOCAL_MACHINE\SOFTWARE\Microsoft\Windows NT\CurrentVersion\Winlogon အား Click လုပ္ပါ။ ညာဘက္႐ွိ Box ထဲတြင္ Userinit file အား Double Click ပါ။ Value Data: ေအာက္႐ွိ Box တြင္ C:\WINDOWS\system32\userinit.exe, ဟု ေရးသားထားတာ မွန္ ၊ မမွန္ စစ္ေဆးၿပီီး OK ေပးပါ။


၆။ Restart ေပးၿပီး Windows ျပန္တက္ေသာအခါ ပုံမွန္အတိုင္း လုပ္ေဆာင္သြားမည္ ျဖစ္ပါသည္။


မွတ္ခ်က္။ ။Drives & USB အားလုံး လုပ္ေဆာင္စရာ မလိုပါ။ Double Click လုပ္၍ မရေသာ Drives & USB ကိုသာ လုပ္ေဆာင္ရမည္ ျဖစ္ပါသည္။

Uninstall လုပ္၍ မရေသာ Software အား Uninstall လုပ္ျခင္း

တခ်ဳိ႕ေသာ Software မ်ားမွာ အေၾကာင္းေၾကာင္းေၾကာင္႔ Uninstall လုပ္တဲ႔အခါမွာ ေတာ္ေတာ္ေလး အခက္အခဲ ျဖစ္တာကို ေတြ႕ရပါတယ္။ အဲဒီလို အခက္အခဲေလးနဲ႕ ႀကံဳတဲ႔အခါ ကၽြန္ေတာ္ ေဖာ္ျပေပးတဲ႔ နည္းလမ္းေလးနဲ႔ ေျဖ႐ွင္းၾကည္႔လိုက္ပါ အဆင္ေျပသြားပါလိမ္႔မည္။

၁။ Start – Run – regedit ဟု ႐ိုက္ထည္႔ပါ။ Backup လုပ္ဖို႔ မေမ႔နဲ႔ဦးေနာ္။

၂။ HKEY_LOCAL-MACHINE\Software\Microsoft\Windows\CurrentVersion\Uninstall ေအာက္႐ွိ မိမိ Uninstall လုပ္ခ်င္ေသာ Software ကုိ Click လုပ္ပါ။


၃။ ညာဘက္႐ွိ Box ထဲတြင္ UninstallString file အား Double Click ပါ။ Value Data: ေအာက္႐ွိ Box တြင္ C:\Program Files\WordWeb\uninst.exe ကို Copy လုပ္ၿပီီး OK ေပးပါ။


၄။ Start – Run ထဲတြင္ C:\Program Files\WordWeb\uninst.exe ကို Paste လုပ္ၿပီး OK ေပးပါ။ Uninstall အား ပုံမွန္အတိုင္း အဆင္႔ဆင္႔ လုပ္ေဆာင္သြားမည္ ျဖစ္ပါသည္။

Windows တက္လွ်င္ ျမန္ေစရန္ လုပ္ေဆာင္ေပးျခင္း

Windows Screen ေပၚၿပီး Loading လုပ္ေသာ အႀကိမ္ အေရအတြက္သည္ မ်ားေသာအားျဖင္႔ ၁၂ ႀကိမ္ လုပ္ေဆာင္ ပါသည္။ ကၽြန္ေတာ္ႏွင္႔အတူ လုိက္လုပ္ၾကည္႔ပါ။ အႀကိမ္ အေရအတြက္သည္ ဘယ္ေလာက္အထိ ေလ်ာ႔နည္းသြားမည္ ဆိုတာကို ကိုယ္တိုင္ ေတြ႕ျမင္ရမည္ ျဖစ္ပါသည္။

၁။ Start – Run – regedit ဟု႐ိုက္ပါ။ Registry ထဲ ၀င္သည္႔ အခါတိုင္း backup file လုပ္ေဆာင္ရန္ ဘယ္ေတာ႔မွ မေမ႔ပါနဲ႔။


၂။ HKEY_LOCAL_MACHINE\SYSTEM\CurrentControlSet\Control\Session Manager\Memory Management အား Click လုပ္ပါ။ ညာဘက္႐ွိ Box ထဲတြင္ DisablePagingExecutive file အား Double Click ပါ။ Value Data: ေအာက္႐ွိ Box တြင္ 1 ဟု႐ိုက္ၿပီး Base တြင္ Decimal ၊ OK ေပးပါ။


၃။ ညာဘက္႐ွိ Box ထဲတြင္ LargeSystemCache file အား Double Click ပါ။ Value Data: ေအာက္႐ွိ Box တြင္ 1 ဟု႐ိုက္ၿပီး Base တြင္ Decimal ၊ OK ေပးပါ။


၄။ Restart ေပးၿပီး Windows ျပန္တက္လာေသာအခါ အႀကိမ္ အေရအတြက္သည္ ဘယ္ေလာက္အထိ ေလ်ာ႔နည္းသြားမည္ ဆိုတာကို ကိုယ္တိုင္ သိၿပီဟုတ္…..:P

My Computer Dialog Box / Menu Bar ႐ိွ Tools ထဲတြင္ Folder Options ေပ်ာက္ေနလွ်င္ ျပန္ေဖာ္ျခင္း

ဒီ Problem ေလးက ကၽြန္ေတာ္တို႕ ပတ္၀န္းက်င္မွာ တစ္ခါတစ္ေလမွ ျဖစ္တာကို ေတြ႕ရပါတယ္။ ျဖစ္လာခဲ႔လွ်င္ အကူအညီ ေပးႏိူင္ေအာင္လို႔ ေရးသားေပးလိုက္ျခင္း ျဖစ္ပါသည္။

၁။ My Computer – Local Disk(C:) – Manu Bar မွ Tools ကို Click လုပ္ပါ။ Folder Options ေပ်ာက္ေနတာကို ေတြ႕ရမည္ ျဖစ္ပါသည္။


၂။ Start – Run – gpedit.msc ဟု ႐ိုက္ပါ။


၃။ Local Computer Policy – User Configuration – Administrative Templates – Windows Components – Windows Explorer ကို Click ပါ။


၄။ ညာဘက္႐ွိ Box ထဲတြင္ Removes the Folder Options menu item from the Tools menu ကို Double Click လုပ္ပါ။ Not Configured ကို Check ေပးၿပီး Apply ၊ OK ေပးပါ။


၅။ My Computer – Local Disk(C:) – Menu Bar မွ Tools ကို Click လုပ္ပါ။ Folder Options ျပန္ေပၚေနတာကို ေတြ႕ရမည္ ျဖစ္ပါသည္။

Default Shares ေတြကို ပိတ္ထားျခင္းျဖင္႔ အ Hack မခံရေအာင္ ကာကြယ္ျခင္း

Computer ေလ႔လာေနေသာ လူတစ္ေယာက္အတြက္ မိမိ Computer အား လုံၿခဳံမူ႕႐ွိေစရန္ လုပ္ေဆာင္ရန္မွာ သိသင္႔ေသာ ၊ အေရးႀကီးေသာ အခ်က္တစ္ခ်က္ ျဖစ္ပါသည္။ Defaults Shares ေတြကို ဘယ္လုိ ဘယ္နည္းနဲ႔ ပိတ္ရတယ္ဆိုတာကို ကၽြန္ေတာ္ႏွင္႔အတူ လိုက္လုပ္ၿပီး သင္႔ရဲ႕ Computer အား လုံၿခဳံမူ႕႐ွိေစရန္ လုပ္ေဆာင္ပါ။

၁။ Start – Run – regedit ဟု ႐ိုက္ထည္႔ပါ။ Backup လုပ္ဖို႔ မေမ႔နဲ႔ဦးေနာ္။


၂။ HKEY_LOCAL_MACHIE\SYSTEM\CurrentControlSet\Services\Lanmanserver\Parameters ကို Click ပါ။


၃။ ညာဘက္႐ွိ Box ထဲတြင္ AutoShareWks file ကို ႐ွာပါ။ မေတြ႕ခဲ႔လွ်င္ လြတ္ေနေသာ ေနရာတြင္ Right Click – New – DWORD value ကိုေ႐ြးပါ။ New Value #1 ဆိုတဲ႔ ေနရာမွာ AutoShareWks ဟု ေရးပါ။


၄။ AutoShareWks file အား Double Click ပါ။ Value Data: ေအာက္႐ွိ Box တြင္ 0 ( zero ) ဆို Default Shares ေတြကို Close တာ 1 ( one ) ဆို Default Shares ေတြကို Open တာ၊ 0 (zero ) ေပးၿပီး OK ေပးပါ။

၅။ Restart ေပးၿပီး Windows ျပန္တက္ေသာအခါ Default Shares ေတြကို ပိတ္ၿပီးသား ျဖစ္သြားပါလိမ္႔မည္။

Run ထဲမွ Commands မ်ားအား Delete လုပ္ျခင္း

Run Commands ေတြကို အသံုးမ်ားေသာ လူမ်ားအတြက္ Run Box ထဲမွာ Run Commands ေတြအမ်ားႀကီး ႐ွိေနတာကို ေတြ႕ရမည္ ျဖစ္ပါသည္။ မိမိ Delete လုပ္ခ်င္ေသာ Command အား Delete လုပ္ႏိူင္ေစရန္ ေဖာ္ျပ ေပးလိုက္ပါတယ္။
၁။ Start – Run – Scroll Bar ကို Click လုပ္လိုုက္လွ်င္ Run Commands ေတြအမ်ားႀကီး ႐ွိေနတာကို ေတြ႕ရမည္ ျဖစ္ပါသည္။


၂။ Start – Run – regedit ဟု ႐ိုက္ပါ။ မိမိကိုယ္ကို ယုံၾကည္တယ္ ဆိုရင္ေတာ႔ backup file မလုပ္ေတာ႔ပါနဲ႔ …

၃။ HKEY_CURRENT_USER\SOFTWARE\Microsoft\Windows\CurrentVersion\Explorer \RunMRUအား Click လုပ္ပါ။


၄။ ညာဘက္႐ွိ Box ထဲတြင္ Delete လုပ္ခ်င္ေသာ File အား Right Click ၊ Delete လုပ္ပါ။ မိမိ Delete လုပ္ခ်င္ေသာ Command အားလုံးကို Delete လုပ္ႏိူင္ပါသည္။


၅။ Confirm Value Delete Box ေပၚလာေသာအခါ Yes ေပးပါ။


၆။ Restart ေပးၿပီး Windows ျပန္တက္ေသာအခါ Run Box ထဲတြင္ Run Command (e.g:gpedit.msc) ပ်က္သြားမည္ ျဖစ္ပါသည္။

Computer ေ၀ါဟာရ အ႐ွည္ေကာက္မ်ား

အခ်ဳိ႕ Computer အသုံးျပဳေသာ လူမ်ားသည္ မ်ားေသာအားျဖင္႔ Computer ေ၀ါဟာရ အတိုေကာက္မ်ားသာ သိ႐ွိၾကၿပီး အ႐ွည္ကို မသိသူမ်ား ႐ွိတက္ၾကပါသည္။ အဲဒီလို မသိေသးေသာ သူမ်ားအတြက္ ကၽြန္ေတာ္ လက္လွမ္းမီွသေလာက္ စုစည္းထားေသာ Computer ေ၀ါဟာရ အ႐ွည္ေကာက္မ်ားအား ေအာက္တြင္ ေဖာ္ျပ ေပးလိုက္ပါတယ္။
  1. ACPI – Advanced Configuration and Power Interface
  2. AGP – Accelerated Graphic Port
  3. APM – Advanced Power Management
  4. ASIC – Application Specific Integrated Circuit
  5. BIOS – Basic Input / Output System
  6. CD – Compact Disk
  7. CMOS – Complementary Metal Oxide Semiconductor
  8. CPU – Central Processing Unit
  9. CRT – Cathode Ray Tube
  10. DDR2 – Double Data Rate2
  11. DIMM – Dual Inline Memory Module
  12. DMA – Direct Memory Access
  13. DOS – Disk Operating System
  14. DRAM – Dynamic Random Access Memory
  15. DVD – Digital Video Disk
  16. ECP – Extended Capabilities Port
  17. FSB – Front Side Bus
  18. FTP – File Transfer Protocol
  19. GbE – Gigabit Ethernet
  20. HD – Hard DiskIDE – Integrated Drive Electronic
  21. IRQ – Interrupt Re Quest
  22. ISP – Internet Service Provider
  23. LAN – Local Area NetworkLCD – Liquid Crystal Display
  24. LED – Light Emitting Diode
  25. LGA – Land Grid ArrayMac
  26. OS – Macintosh Operating System
  27. MB – Mother Board
  28. MPEG – Motion Pictures Experts Group
  29. PAE – Physical Address Extension
  30. PCI – Protocol Control Information
  31. PDF – Portable Document Format
  32. POST – Power On Self Test
  33. PSU – Power Supply Unit
  34. ROM – Read Only Memory
  35. RTC – Real Time Clock
  36. S/PDIF – Serial/Parallel Data Interchange Format
  37. SATA – Serial ATA
  38. SCSI – Small Computer Systems Interface
  39. SS/DS – Single –Sided / Double – Sided
  40. USB – Universal Serial BusVGA – Video Graphics Array
  41. WAN – Wide Area NetworkWindows
  42. XP – Windows eXPerience

Restart Shortcut ဖန္တီးျခင္း

အသုံးျပဳရတာ လြယ္ကူေအာင္ Restart Shortcut ဖန္တီီးျခင္းကို ေရးသား ေဖာ္ျပေပးလိုက္ပါတယ္။ အားလုံး အသုံး၀င္မယ္လို႔ ထင္ပါတယ္။

၁။ Windows Screen ႐ွိ လြတ္ေနေသာ ေနရာတြင္ Right Click – New – Shortcut ကုိေ႐ြးပါ။ Type the location of the item: ေအာက္႐ွိ Box ထဲတြင္ shutdown –r –t 0 ဟု ႐ိုက္ၿပီး Next ေပးပါ။

၂။ Type a name for this shortcut: ေအာက္႐ွိ Box ထဲတြင္ Restart PC ဟု ႐ိုက္ၿပီး Finish ေပးပါ။

၃။ Restart PC Shortcut – Right Click – Properties – Change Icon ကို Click လုပ္ၿပီး OK ေပးပါ။ Change Icon Dialog မွ Restart Shortcut ကို ေ႐ြးၿပီး OK ၊ OK ေပးပါ။


၄။ Restart PC Shortcut ကို Double Click လိုက္ေသာအခါ Restart ျဖစ္သြားမည္ ျဖစ္ပါသည္။


Run Commands

Computer အသုံးျပဳေသာ လူမ်ားသည္ Run Commands ေတြကုိ ေကာင္းေကာင္း နားလည္ၿပီး ေကာင္းေကာင္း အသံုးျပဳတတ္ဖို႔ လိုအပ္ပါသည္။ ဘာလို႔လဲဆိုေတာ႔ မိမိ Open ခ်င္ေသာ File ကို အဆင္႔ဆင္႔ Open စရာမလိုပဲ Start – Run ကေန Open လွ်င္ တိုက္႐ိုက္ Open လို႔ရေသာေၾကာင္႔ အသံုးျပဳရတာ ပိုမို လြယ္ကူပါသည္။ အသံုးမ်ားေသာ Run Commands ေတြကိုေတာ႔ Clour နဲ႔ ေဖာ္ျပ ေပးထားပါတယ္။

To Access…. Run Command
1. Accessibility Controls - access.cpl
2. Accessibility Wizard - accwiz
3. Add Hardware Wizard - hdwwiz.cpl
4. Add/Remove Programs - appwiz.cpl
5. Administrative Tools - control admintools
6. Adobe Acrobat (if installed) - acrobat
7. Adobe Designer (if installed) - acrodist
8. Adobe Distiller (if installed) - acrodist
9. Adobe ImageReady (if installed) - imageready
10. Adobe Photoshop (if installed) - photoshop
11. Automatic Updates - wuaucpl.cpl
12. Bluetooth Transfer Wizard - fsquirt
13. Calculator - calc
14. Certificate Manager - certmgr.msc
15. Character Map - charmap
16. Check Disk Utility - chkdsk
17. Clipboard Viewer - clipbrd
18. Command Prompt - cmd
19. Component Services - dcomcnfg
20. Computer Management - compmgmt.msc
21. Control Panel - control

22. Date and Time Properties - timedate.cpl
23. DDE Shares - ddeshare
24. Device Manager - devmgmt.msc
25. Direct X Control Panel (If Installed)* - directx.cpl
26. Direct X Troubleshooter - dxdiag
27. Disk Cleanup Utility - cleanmgr
28. Disk Defragment - dfrg.msc
29. Disk Management - iskmgmt.msc
30. Disk Partition Manager - diskpart
31. Display Properties - control desktop
32. Display Properties - desk.cpl
33. Display Properties (w/Appearance Tab Preselected) - control color
34. Dr. Watson System Troubleshooting Utility - drwtsn32
35. Driver Verifier Utility - verifier
36. Event Viewer - eventvwr.msc
37. Files and Settings Transfer Tool - migwiz
38. File Signature Verification Tool - sigverif
39. Findfast - findfast.cpl
40. Firefox (if installed) - firefox
41. Folders Properties - control folders
42. Fonts - control fonts
43. Fonts Folder - fonts
44. Free Cell Card Game - freecell
45. Game Controllers - joy.cpl
46. Group Policy Editor (XP Prof) - gpedit.msc
47. Hearts Card Game - mshearts
48. Help and Support - helpctr
49. HyperTerminal - hypertrm
50. Iexpress Wizard - iexpress
51. Indexing Service - ciadv.msc
52. Internet Connection Wizard - icwconn1
53. Internet Explorer - iexplore
54. Internet Properties - inetcpl.cpl
55. Internet Setup Wizard - inetwiz
56. IP Configuration (Display Connection Configuration) - ipconfig /all
57. IP Configuration (Display DNS Cache Contents) - ipconfig /displaydns
58. IP Configuration (Delete DNS Cache Contents) - ipconfig /flushdns
59. IP Configuration (Release All Connections) - ipconfig /release
60. IP Configuration (Renew All Connections) - ipconfig /renew
61. IP Configuration (Refreshes DHCP & Re-Registers DNS) - ipconfig /registerdns
62. IP Configuration (Display DHCP Class ID) - ipconfig /showclassid
63. IP Configuration (Modifies DHCP Class ID) - ipconfig /setclassid
64. Java Control Panel (If Installed) - jpicpl32.cpl
65. Java Control Panel (If Installed) - javaws
66. Keyboard Properties - control keyboard
67. Local Security Settings - secpol.msc
68. Local Users and Groups - lusrmgr.msc
69. Logs You Out Of Windows - logoff
70. Malicious Software Removal Tool - mrt
71. Microsoft Access (if installed) - access.cpl
72. Microsoft Chat - winchat
73. Microsoft Excel (if installed) - excel
74. Microsoft Frontpage (if installed) - frontpg
75. Microsoft Movie Maker - moviemk
76. Microsoft Paint - mspaint
77. Microsoft Powerpoint (if installed) - powerpnt
78. Microsoft Word (if installed) - winword
79. Microsoft Syncronization Tool - mobsync
80. Minesweeper Game - winmine
81. Mouse Properties control - mouse
82. Mouse Properties - main.cpl
83. Nero (if installed) - nero
84. Netmeeting - conf
85. Network Connections - control netconnections
86. Network Connections - ncpa.cpl
87. Network Setup Wizard - netsetup.cpl
88. Notepad - notepad
89. Nview Desktop Manager (If Installed) - nvtuicpl.cpl
90. Object Packager - packager
91. ODBC Data Source Administrator - odbccp32.cpl
92. On Screen Keyboard - osk
93. Opens AC3 Filter (If Installed) - ac3filter.cpl
94. Outlook Express - msimn
95. Paint - pbrush
96. Password Properties - password.cpl
97. Performance Monitor - perfmon.msc
98. Performance Monitor - perfmon
99. Phone and Modem Options - telephon.cpl
100. Phone Dialer - dialer
101. Pinball Game - pinball
102. Power Configuration - powercfg.cpl
103. Printers and Faxes - control printers
104. Printers Folder - printers
105. Private Character Editor - eudcedit
106. Quicktime (If Installed) - QuickTime.cpl
107. Quicktime Player (if installed) - quicktimeplayer
108. Real Player (if installed) - realplay
109. Regional Settings intl.cpl
110. Registry Editor - regedit
111. Registry Editor - regedit32
112. Remote Access Phonebook - rasphone
113. Remote Desktop mstsc114. Removable Storage - ntmsmgr.msc
115. Removable Storage Operator Requests - ntmsoprq.msc
116. Resultant Set of Policy (XP Prof) - rsop.msc
117. Scanners and Cameras - sticpl.cpl
118. Scheduled Tasks control - schedtasks
119. Security Center - wscui.cpl
120. Services - services.msc
121. Shared Folders - fsmgmt.msc
122. Shuts Down Windows - shutdown
123. Sounds and Audio - mmsys.cpl

124. Spider Solitare Card Game - spider
125. SQL Client Configuration - cliconfg
126. System Configuration Editor - sysedit
127. System Configuration Utility - msconfig
128. System File Checker Utility (Scan Immediately) - sfc /scannow

129. System File Checker Utility (Scan Once At Next Boot) - sfc /scanonce
130. System File Checker Utility (Scan On Every Boot) - sfc /scanboot
131. System File Checker Utility (Return to Default Setting) - sfc /revert
132. System File Checker Utility (Purge File Cache) - sfc /purgecache
133. System File Checker Utility (Set Cache Size to size x) - sfc /cachesize=x
134. System Information - msinfo32
135. System Properties - sysdm.cpl
136. Task Manager - taskmgr
137. TCP Tester - tcptest
138. Telnet Client - telnet
139. Tweak UI (if installed) - tweakui
140. User Account Management - nusrmgr.cpl
141. Utility Manager - utilman
142. Windows Address Book - wab
143. Windows Address Book Import Utility - wabmig
144. Windows Backup Utility (if installed) - ntbackup
145. Windows Explorer - explorer
146. Windows Firewall - firewall.cpl
147. Windows Magnifier - magnify
148. Windows Management Infrastructure - wmimgmt.msc
149. Windows Media Player wmplayer
150. Windows Messenger msmsgs
151. Windows Picture Import Wizard (need camera connected) - wiaacmgr
152. Windows System Security Tool - syskey
153. Windows Update Launches - wupdmgr
154. Windows Version (to show which version of windows) - winver
155. Windows XP Tour Wizard - tourstart
156. Wordpad - write

Shutdown Shortcut ဖန္တီးျခင္း

အသုံးျပဳရတာ လြယ္ကူေအာင္ Shutdown Shortcut ဖန္တီီးျခင္းကို ေရးသား ေဖာ္ျပေပးလိုက္ပါတယ္။ အားလုံး အသုံး၀င္မယ္လို႔ ထင္ပါတယ္။

၁။ Windows Screen ႐ွိ လြတ္ေနေသာ ေနရာတြင္ Right Click – New – Shortcut ကုိေ႐ြးပါ။ Type the location of the item: ေအာက္႐ွိ Box ထဲတြင္ shutdown –s –t 0 ဟု ႐ိုက္ၿပီး Next ေပးပါ။

၂။ Type a name for this shortcut: ေအာက္႐ွိ Box ထဲတြင္ Shutdown PC ဟု ႐ိုက္ၿပီး Finish ေပးပါ။

၃။ Shutdown PC Shortcut – Right Click – Properties – Change Icon ကို Click လုပ္ၿပီး OK ေပးပါ။ Change Icon Dialog မွ Shutdown Shortcut ကို ေ႐ြးၿပီး OK ၊ OK ေပးပါ။

၄။ Shutdown PC Shortcut ကို Double Click လိုက္ေသာအခါ Shutdown ျဖစ္သြားမည္ ျဖစ္ပါသည္။